Shopware
Introduction
Our Shopware plug-in comes with regular updates and full integration support, offering a versatile out-of-the-box solution to accept online payments easily:
- Supports Hosted Checkout Page integration mode.
- Offers the following payment methods on our platform:
Alipay+
American Express
Apple Pay
Bancontact
Bizum
Carte Bancaire
Diners Club
iDEAL
Illicado
Intersolve
JCB
Maestro
MasterCard
Multibanco
PayPal
Visa
WeChat Pay
Keep an eye on our Release Notes to stay informed about updates and new features (i.e. payment methods, features, integration modes) we have added to this plugin!
Check out our documentation to learn how to link your store with our platform to profit from all these features!
Download pluginDownload older versions
To process transactions with this plugin, you need an account on our platform.
This plugin works with both our test and live environment. A test account is a great way to get familiar with both the plugin and our platform. Once you want to go live, create a production account or contact us!
Install plugin
The first step to use the plugin is the installation process. Before you proceed, make sure your infrastructure meets these system requirements:
| Item | Description |
|---|---|
| Plugin package | |
| Direct credentials |
|
| Shopware |
This plugin supports Shopware version v6.4.x.x and above |
| PCI compliancy |
SAQ A |
Once done, follow these steps:
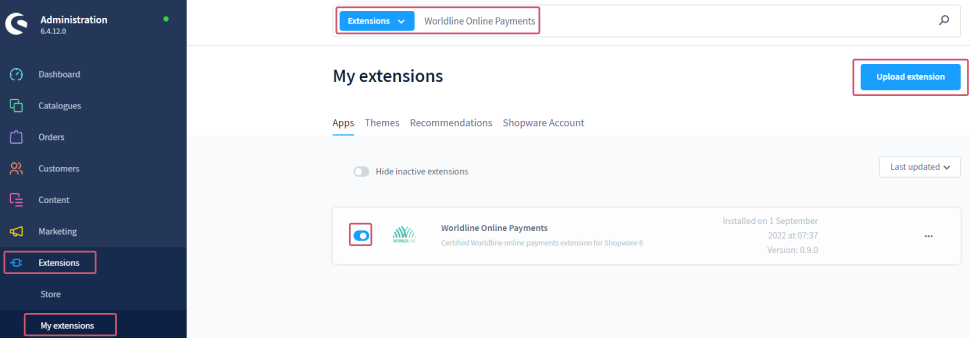
- Login to the Shopware Back Office. Go to Extensions > My extensions > Upload extension.
- Click on the "Upload extension" button. Click on "Confirm" on the pop-up menu and upload the package.
- Once installed, enter "Worldline Online payments" in the “Find extension… “ search bar. Activate the extension using the slider.
Configure Plugin
After the installation, you need to configure the plugin to link your store to our platform.
- Login to the Shopware Back Office. Go to Extensions > My extensions > Apps.
- Enter "Worldline Online payments" in the "Find extension…" search bar.
| Property | Description/Actions |
|---|---|
| Sales channel |
Define whether you want to apply the settings globally for all your stores ("All Sales Channels") or for an individual store (select the appropriate one from the drop down list). If you select an individual store, you can inherit any property value from the global settings you configured in "All Sales Channels". To do so, click on "Restore inheritance" on the linker symbol for any of the available properties. |
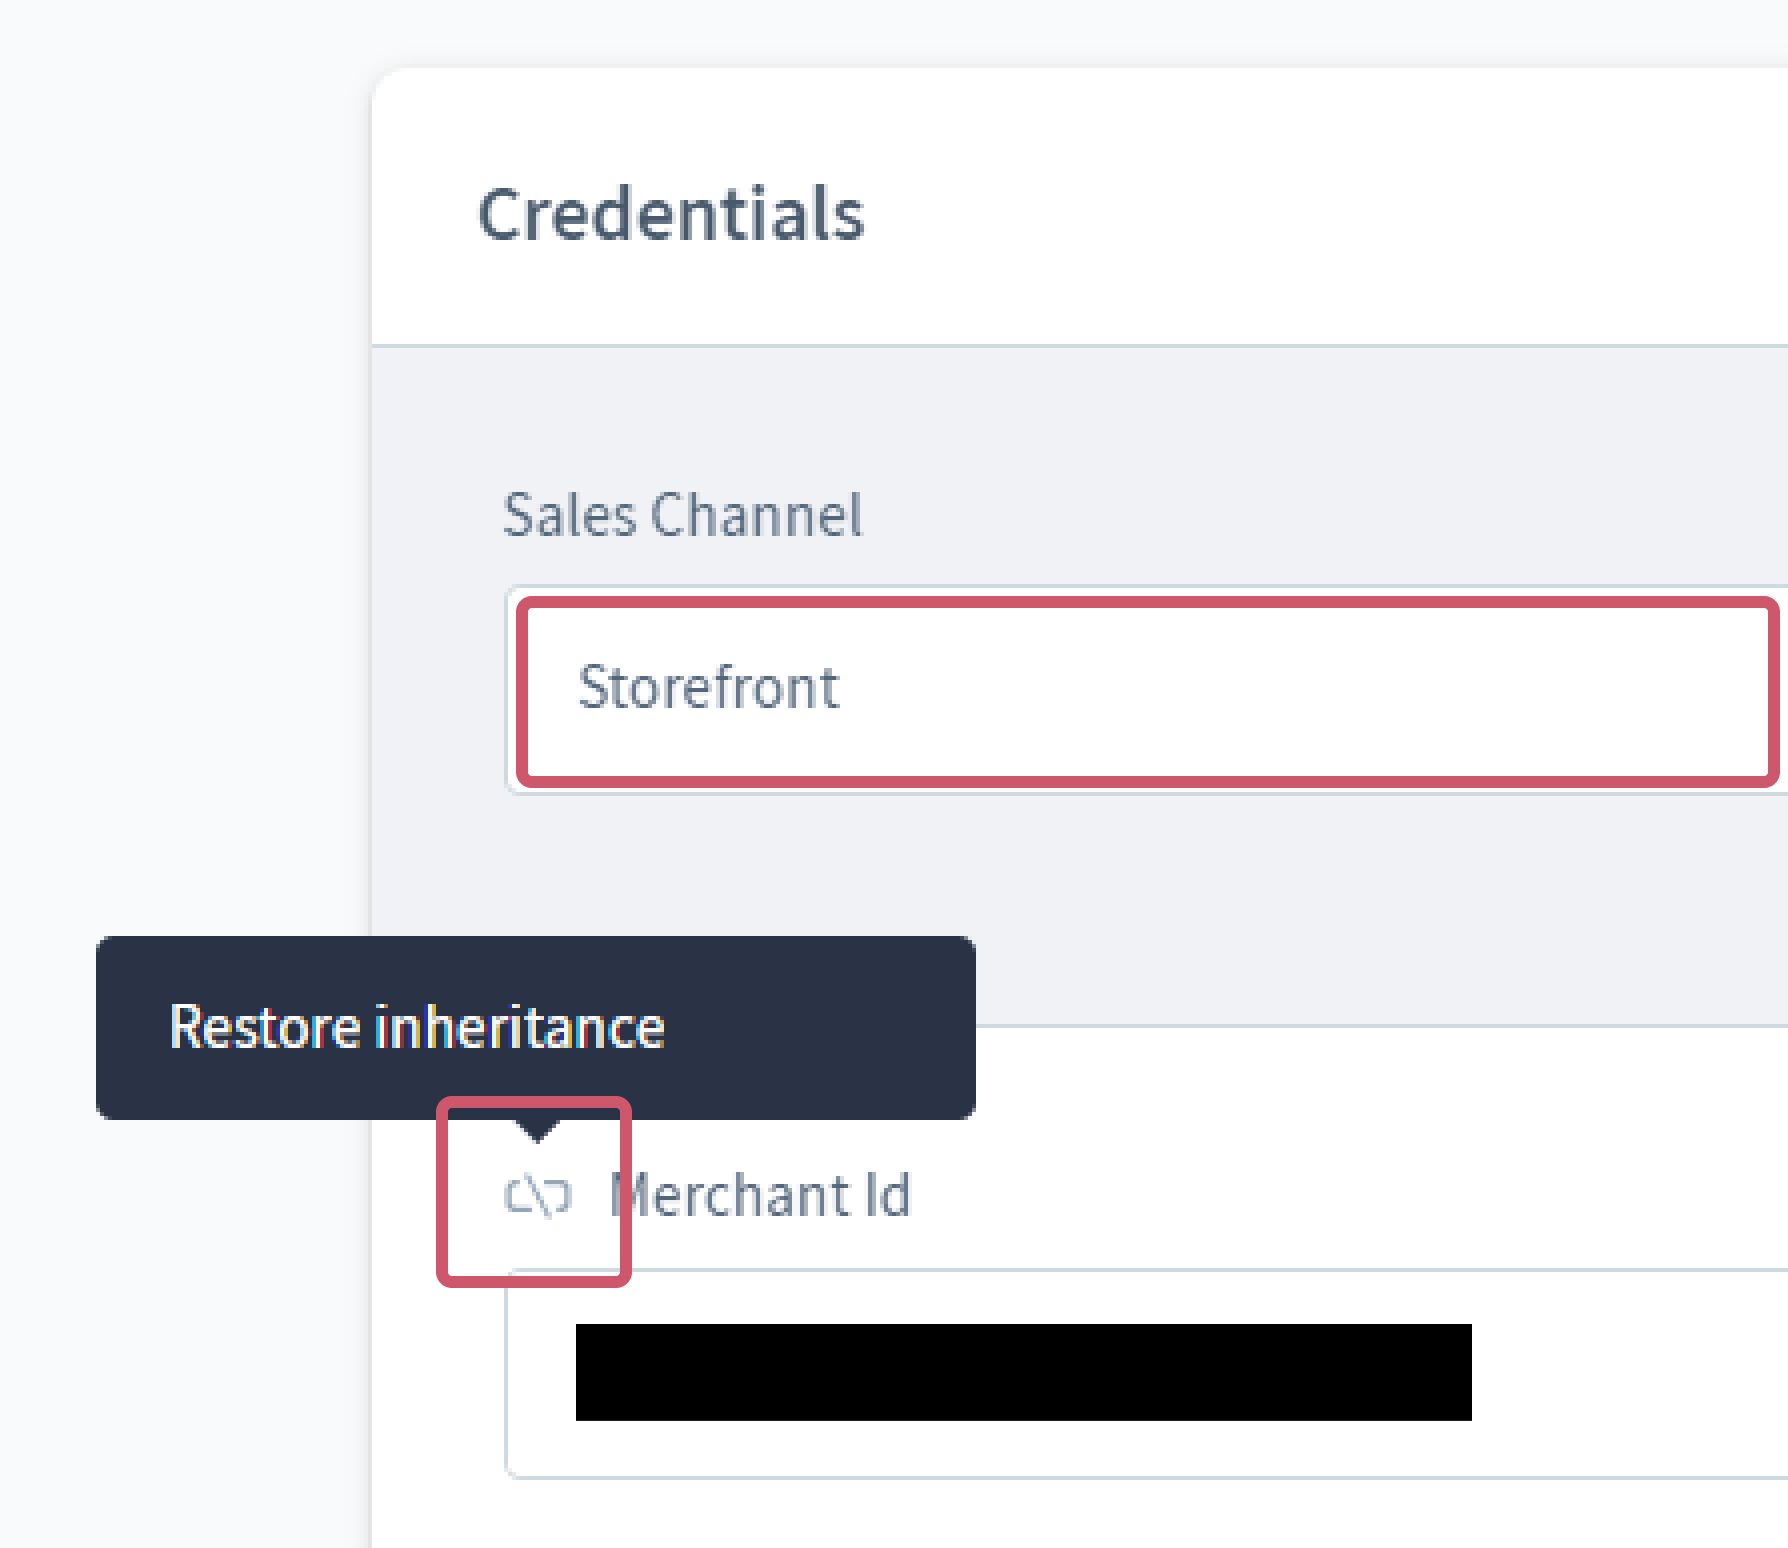
| Merchant Id |
Enter your test/live PSPID from our platform that you want to use for transaction processing. |
| API Key |
Enter the test/live API Key of your test or live PSPID. Read our dedicated guide to learn how to generate one. |
| API Secret |
Enter the test/live API Secret of your test or live PSPID. Read our dedicated guide to learn how to generate one. |
| Webhook key |
Enter the webhooks Key of your test/live PSPID from the Merchant Portal as described in our dedicated guide. |
| Webhook secret |
Enter the webhooks Secret of your test/live PSPID from the Merchant Portal as described in our dedicated guide. |
| Live endpoint |
https://payment.direct.worldline-solutions.com |
| Sandbox endpoint |
https://payment.preprod.direct.worldline-solutions.com |
| Is live mode |
(De-)Flag to link your shop to the respective environment. Depending on your selection, the shop module will send the transaction requests to the test or production environment.
|
| Payment Methods |
Define which payment methods are available for your customers on the Hosted Checkout Page
Make sure to use the dedicated "Save" button for this property to confirm your payment method settings. |
| Automatic capture |
Define whether to process the transactions as authorisation mode or as direct sale. Select one of the following options that fits your business needs:
If you set this property to "Disabled", beware of the following:
|
- Click on the “Save” button on op of the screen to confirm your settings.
- Click on the "Test connection" button to verify the configuration by establishing a test connection between the plugin and our platform. Make sure the message "Connection was successfully tested" appears in the pop-up window. If it indicates a failed test, follow these steps:
a) Verify the API Key/Secret and/or Webhook Key/Secret and (re)configure them on our platform/in the Shopware Back Office.
b) If the connection test still fails, contact your system administrator for troubleshooting.
- Be aware that you can only configure these properties for only one environment simultaneously.
- Make sure to:
- Replace all test credentials with live credentials / flag "Is live mode" as soon as you have finalised your tests.
- Not mix up data from test/production and vice versa when configuring these properties in the module.
Manage payments
We have designed the plugin to follow-up on your orders automatically and autonomously, freeing you from the administration involved. Learn here how to use our plugin effectively which could help your business to thrive!
Perform maintenance operations
Captures, refunds and cancellations of authorisations are standard processes (maintenance operations) in your everyday business logic. Learn here how to perform these operations directly in the Shopware Back Office:
- Login to the Shopware Back Office. Go to Orders > Overview. Click on the order in the table.
- In the order overview, go to Worldline transaction control. Depending on the order’s status (column "Payment status" in Orders > Overview), the following buttons are functional:
Worldline / Shopware order status Available buttons statusOutput.statusCode=5 / Authorized - "Capture payment": Capture the authorised amount to receive the funds for the order.
- "Cancel payment": Cancel the authorised amount.
statusOutput.statusCode=9 / Paid - "Refund payment": Reimburse the funds for the order.
Any status "Check status": Send a status update request to our platform to get its current status.
Perform test transactions
Use our platform's test environment to make sure your plugin works as intended. We offer test data sets on our dedicated Test cases page. Target our test environment as described in the "Configure Plugin" section.
Make sure to switch to the LIVE environment as soon as you have finalised your tests.