PrestaShop
Introduction
Our PrestaShop plug-in comes with regular updates and full integration support, offering a versatile out-of-the-box solution to accept online payments in your shop easily:
- Implements Lightening Mode to go live with 1 click (all settings chosen by default).
- Supports both Hosted Checkout Page and Hosted Tokenization Page integration mode.
Offers the following payment methods on our platform:
Alipay+
American Express
Apple Pay
Bancontact
Bizum
Carte Bancaire
Cpay
Diners Club
iDEAL
Illicado
Intersolve
JCB
Klarna
Maestro
MasterCard
Multibanco
Oney 3x-4x
OneyBrandedGiftCard
PayPal
Visa
WeChatPay
- Manages multiple stores.
- Accepts payment operations (Refunds, authorisations, captures etc.) directly from your PrestaShop Back Office.
Keep an eye on our changelog to stay informed about updates and new features (i.e. payment methods, features, integration modes) we have added to this plugin!
Check out our documentation to learn how to link your store with our platform to profit from all these features!
Download pluginGitHub repository
To process transactions with this plugin, you need an account on our platform.
This plugin works with both our test and live environment. A test account is a great way to get familiar with both the plugin and our platform. Once you want to go live, create a production account or contact us!
Install plugin
The first step to use the plugin is the installation process. Before you proceed, make sure your infrastructure meets these system requirements:
| Item | Description |
|---|---|
| Plugin package | |
| Direct credentials |
|
| PrestaShop |
This plugin supports PrestaShop versions:
The plugin has been tested against and up to PrestaShop v1.7.7.8 |
| PrestaShop Prequisites |
|
| PCI compliancy |
SAQ A |
This installation process applies to both scenarios:
- A brand-new PrestaShop project.
- Migration from an old PrestaShop plugin.
- We recommend treating this plugin as a new installation – there is no dependency on your old module.
Once done, follow these steps:
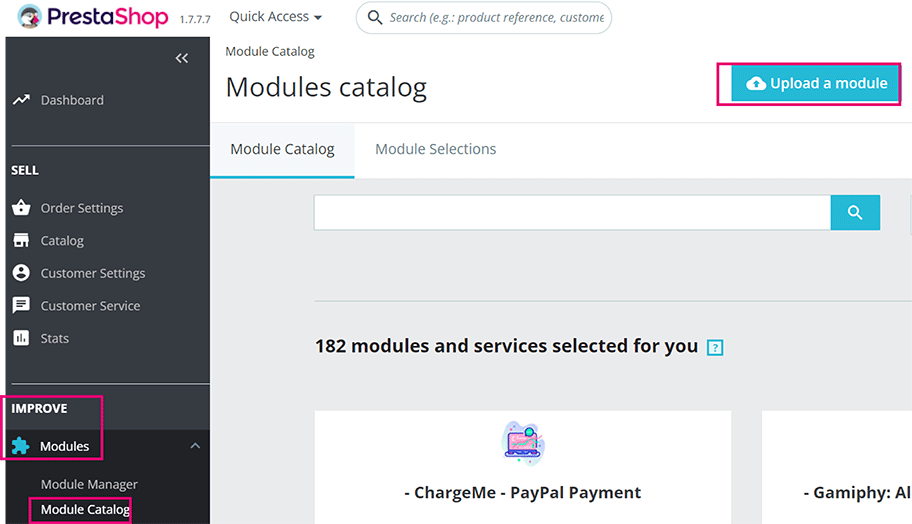
- Login to the PrestShop Back Office. Go to IMPROVE > Modules > Module catalog. Click on "Upload a module" and upload the zip-file.
- The installation process starts automatically. Once done, you can configure the plugin.
- Click on the "Configure" button to start the configuration process. This configuration page allows you to configure the generic parameters of the store, in particular if you are setting it up in a "multistore" context.
If you which to install the module via FTP instead, followed these steps:
- Unzip the PrestShop module zip file.
- Upload the whole file "worldlineop" via FTP file in file directory <yourdomain>/modules.
- Login to the PrestShop Back Office. Go to IMPROVE > Modules > Module catalog. Look up "worldline online payment" in the search bar.
- The module pops up as a search result. Click on "Install" button to continue with the standard installation process.
- You can download the plugin from our platform for free.
- The same plugin package is also available in the PrestaShop Addons Marketplace (for a fee).
Configure Plugin
After the installation, you need to configure the plugin to link your store to our platform.
Configure basic settings
- Login to the PrestaShop Back Office. Go to IMPROVE > Modules > Module Manager > Payment. Click on "Configure" next to "Worldline Online Payments".
- Go to "MY ACCOUNT" tab and configure the following settings:
Property Description/Actions Environment Select between 'Test' or 'Production' to link your shop to the respective environment. Depending on your selection, the shop module will send the transaction requests to the test or production environment.
Make sure to
- Not to mix up credential from test with live and vice versa when configuring fields PSPID/API and webhooks credentials.
- To switch to 'Production' as soon as you have finalised your tests.
Test/Prod PSPID Enter your PSPID from our platform that you want to use for transaction processing. Test / Prod API Key Enter the API key of your test or live PSPID. Read our dedicated guide to learn how to generate one. Test / Prod API Secret Enter the API secret of your test or live PSPID. Read our dedicated guide to learn how to generate one. Test / Prod Webhooks Key Enter the webhooks Key of your test or prod account as described in our dedicated guide. Enter the webhooks Secret of your test or prod account as described in our dedicated guide. Webhooks URL Copy this URL into the Endpoint URLs fields in your account as described in our dedicated guide.
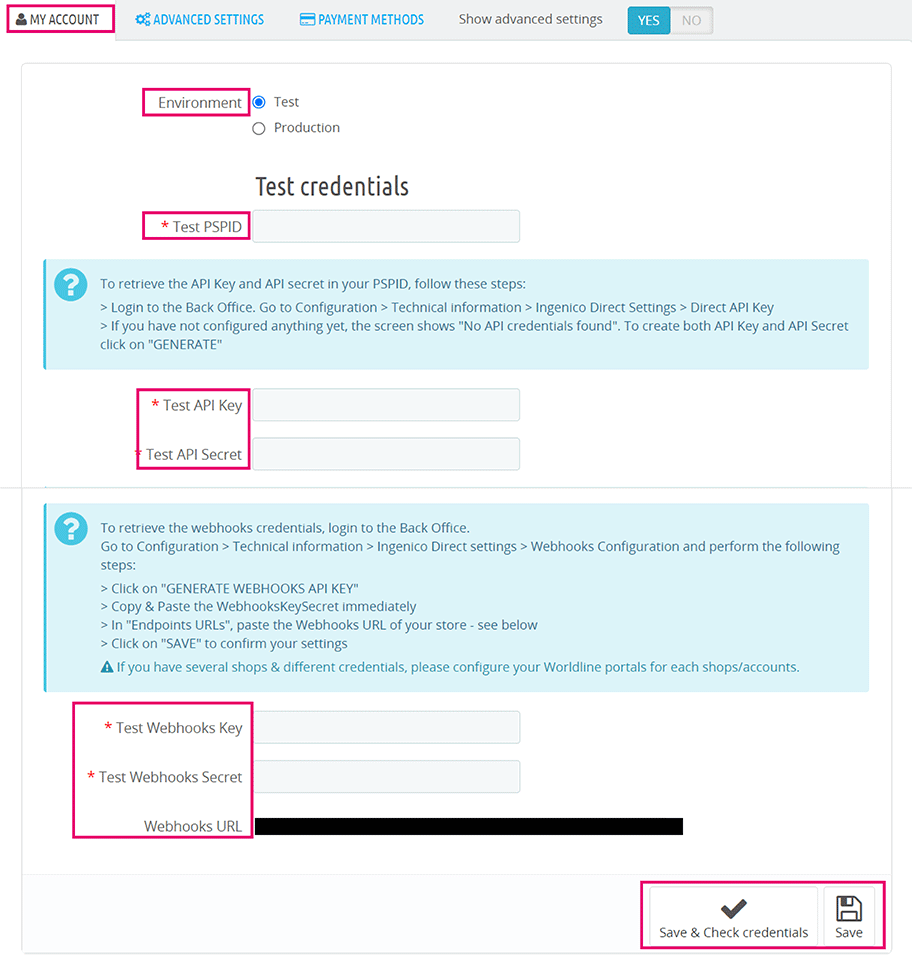
- Click on "Save" if you just want to store your credentials only. Click on “Save & Check credentials”. Make sure the message "Account credentials are valid. Account settings saved successfully." appears.
- Go to IMPROVE > Payment > Preferences. Link the Worldline Online Payments with user groups, carriers, countries and currencies according to your business logic.
- Got to CONFIGURE > Advanced parameters > Email. If you want to send e-mails to confirm orders, make sure PrestaShop sends them correctly. Use the "Test your email configuration" to do so.
- If you choose to use the e-mail sending feature and it does not work correctly, the module will complete the order creation.
- If the e-mail feature does not work as intended, we recommend switching it off by switching to "Never send emails" until you have resolved this issue.
Your plugin is now ready to process payments on our platform!
If you wish to make some optional advanced customisations to optimise your customers’ payment experience, check out our dedicated paragraph what is possible. Do you need to fix issues you encountered during the installation/configuration process? Check our dedicated troubleshooting paragraph.
Configure advanced settings
We have designed our PrestaShop plugin to guarantee you a quick and easy way for transaction processing. The following settings are optional, but you might use them to optimise your customers’ payment experience and to adapt to business requirements.
To do so, follow these steps:
- Login to the PrestaShop Back Office. Go to IMPROVE > Modules > Module Manager > Payment. Click on "Configure" next to "Worldline Online Payments".
- Make sure "Show advanced settings" is set on YES. Go the "ADVANCED SETTINGS" tab and configure the following settings:
Property Description/Actions Transaction Type Define whether to process the transactions as authorisation mode or as direct sale. Select one of the following options:
- Immediate (Authorization + Capture): The amount has been ordered to be paid out in one go. Use this mode to receive the money before shipping the order There are no further actions required to capture the transaction. Successful transactions will have status="CAPTURED" / statusOutput.statusCategory="COMPLETED" / statusOutput.statusCode=9
- Authorized (Authorization Only): the amount is only blocked on your customer's card. Successful transactions will have status="PENDING_CAPTURE" / statusOutput.statusCategory="PENDING_MERCHANT" / statusOutput.statusCode=5 (Use this mode when you wish to capture a transaction only after shipping the order)
If you select "Authorized", also configure the following:
- Delay before payment capture: You can set the capture delay of X days in the given field. At the end of this duration, a cron job will capture the transaction automatically. If the transaction is partially captured already in the meantime, any available funds that remain will be captured.
- Capture cronjob: Copy the cron command from the plugin and paste it in your PrestaShop core for it to auto execute.
If transaction type is set to Authorized , beware of the following:
- Make sure that you capture authorised transaction later. Only then will the transaction have status="CAPTURED" / statusOutput.statusCategory="COMPLETED" / statusOutput.statusCode=9, for which you receive the actual payment for the transaction.
- Even if the capture delay is set to X days, you can also manually capture funds fully / partially by opening an individual order once you have delivered the goods/services.
Enable Advanced Logging If you are in debug mode and need additional logs for troubleshooting, enable this setting. Download any available logs right here. Payment Flow Modification We strongly recommend leave the settings as-is to guarantee safe transaction processing:
- Payment accepted status mapping: Map successful transaction statuses according your business logic.
- Pending payment status mapping: Map pending transaction statuses according your business logic.
- Payment error status mapping: Map unsuccessful transaction statuses according your business logic.
- Release inventory from Pending payment orders after: For any orders in an unknown status, select the time frame after which an automatic cron job will delete the order in the PrestaShop and on our platform.
- Pending Order Cronjob: Copy the cron command from the plugin and paste it in your PrestaShop core for it to auto execute.
- Force 3DsV2: (De)activate the 3-D Secure check. We strongly recommend setting it to YES to avoid a high rate of declined transactions.
This mapping relates only to PrestaShop transaction statuses. The Direct statuses are unaffected by this setting.
- Click on "Save" to confirm your settings.
- Go the "PAYMENT METHODS" tab and configure the following settings:
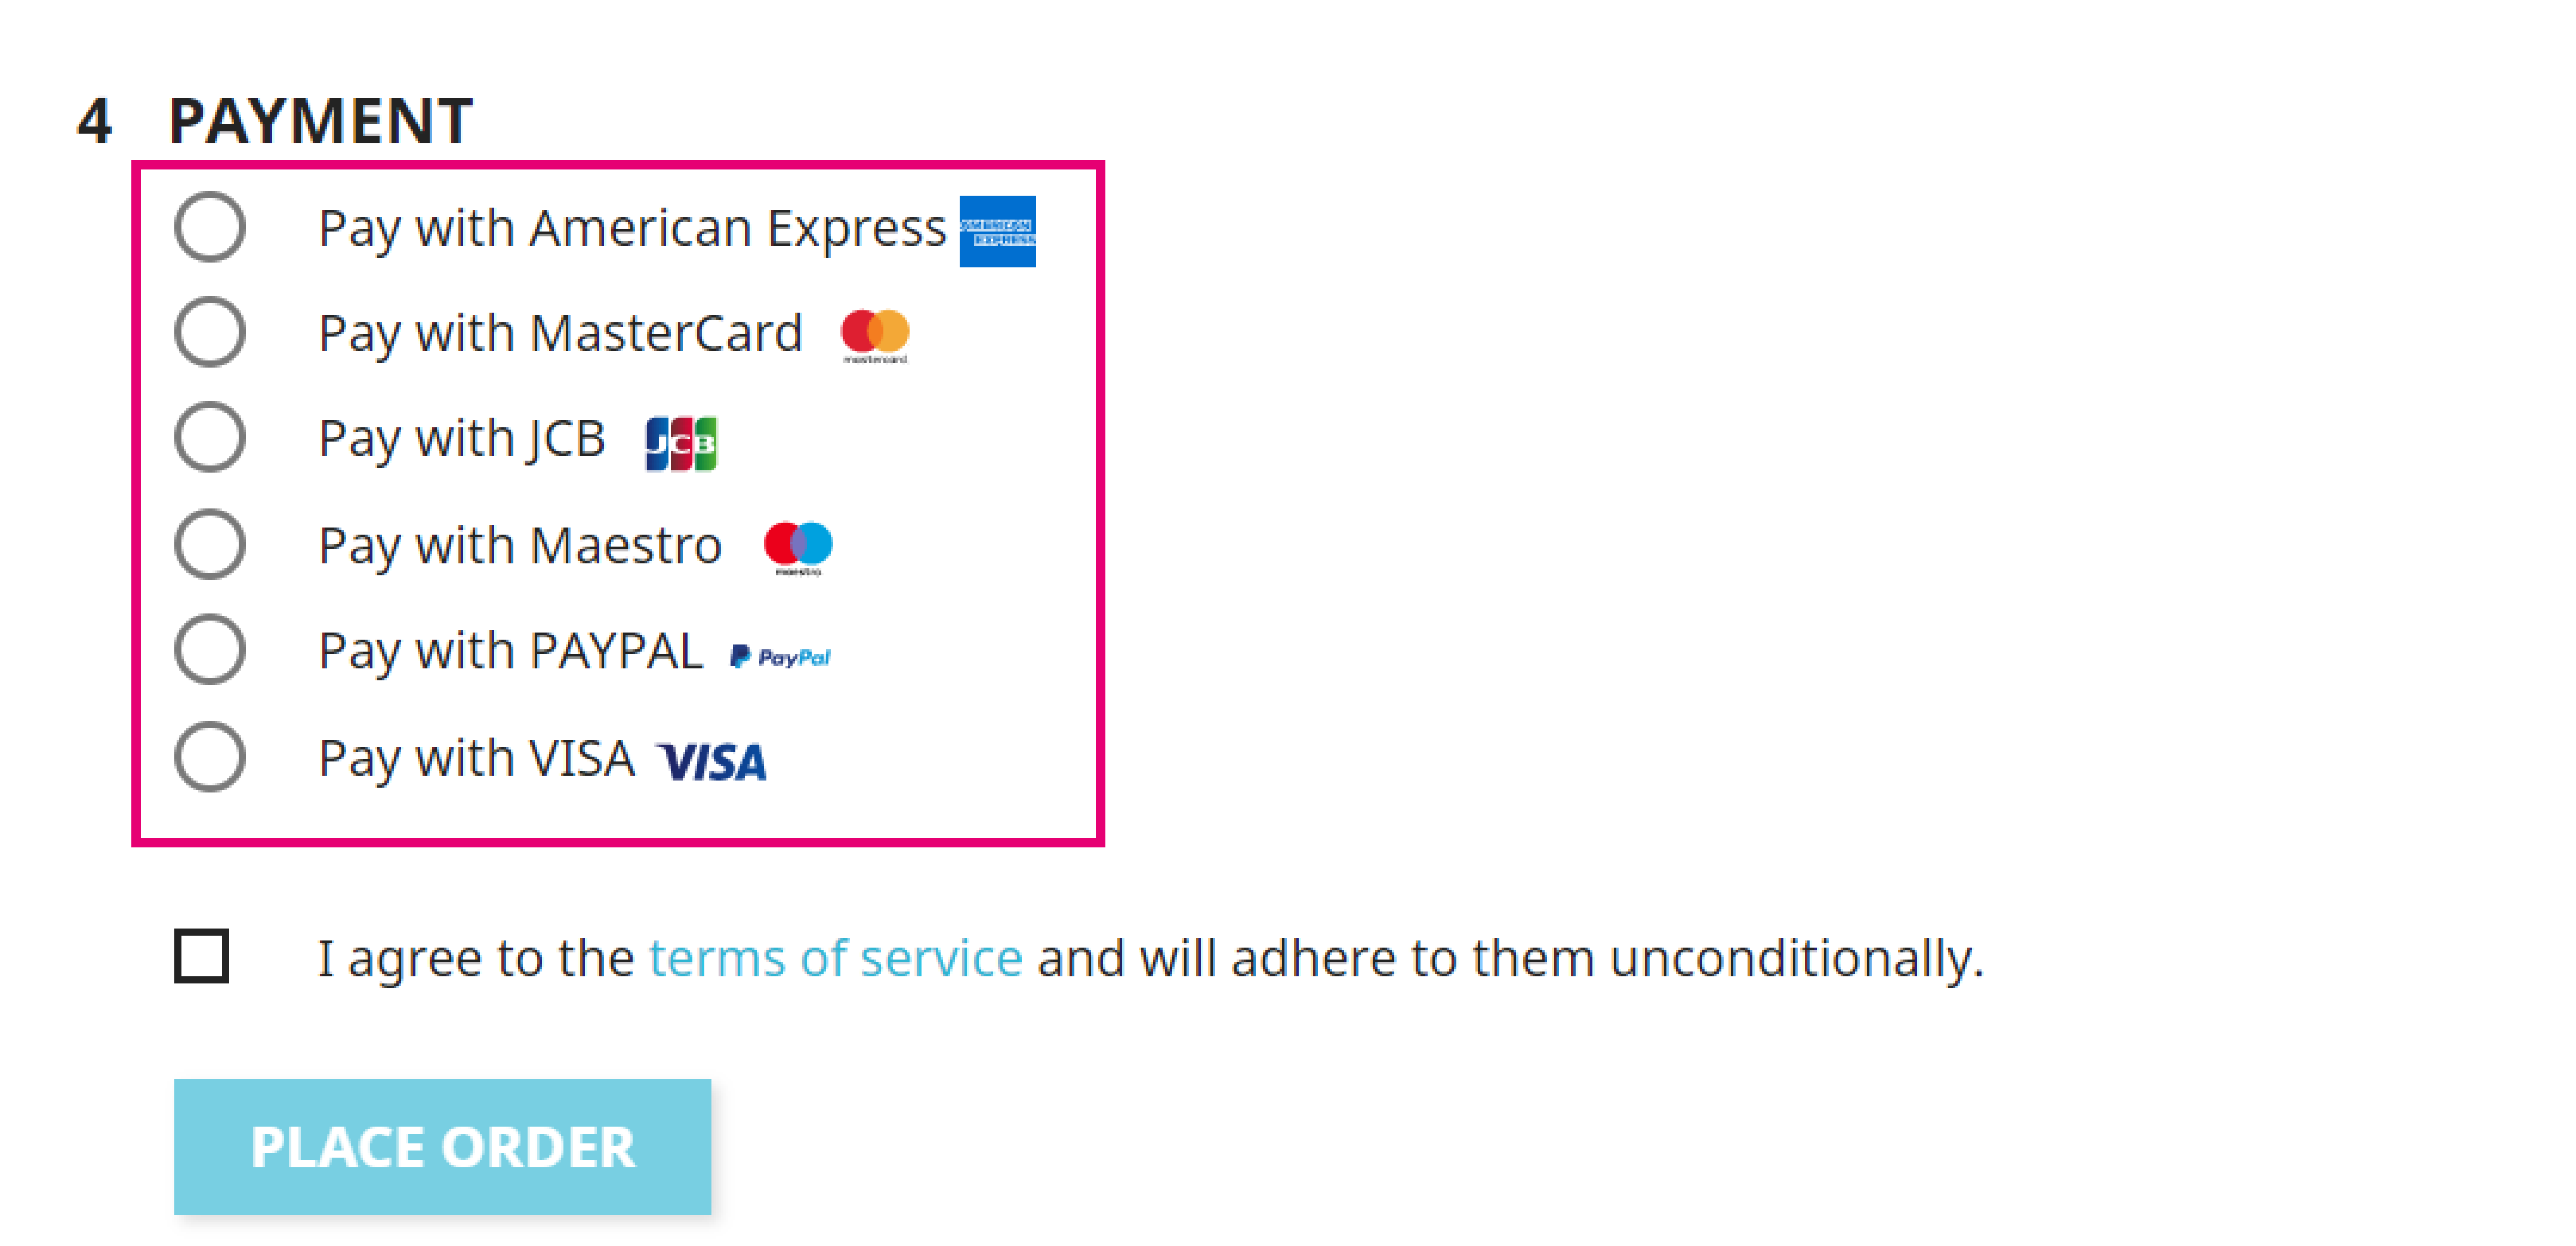
- As the plugin supports both Hosted Checkout Page (Redirect mode) and Hosted Tokenization Page (One page checkout), you can customise you customers’ payment experience by selecting payment methods for either mode and even use both flows together.
- Mind that card payments are available for both modes, whereas alternative payment methods are available only for Hosted Checkout Page.
| REDIRECT MODE (ALL PAYMENT METHODS) | Description/Actions |
|---|---|
| Payment method selection after redirect |
Adapt the payment experience/payment method selection process on the PrestaShop checkout page for the Redirect mode.
This works only if "Payment method selection before redirect" set to YES. |
| Pay button title |
Customise the radio button text on the PrestaShop checkout page. |
| Payment method selection before redirect |
Adapt the payment experience/payment method selection process on the PrestaShop checkout page
This works only if "Payment method selection after redirect" set to YES. |
| Template filename for redirect payment |
Enter the file name of your template to adapt our payment page to the look and feel of your shop. To learn how to create templates, see our dedicated chapters in the !{dv.get('direct.hostedCheckoutPaymentPage')}. |
| ONE PAGE CHECKOUT MODE (CARDS ONLY) | Description/Actions |
|---|---|
|
Adapt the payment experience/payment method selection process on the PrestaShop checkout page.
This works only if either "Payment method selection after redirect" / or “Payment method selection before redirect” set to YES. |
|
| Pay button title |
Customise the payment button text in iframe on the PrestaShop checkout page. |
| Logo displayed on your payment page |
Display a logo process on the PrestaShop checkout page. |
| Payment methods available |
Click the button to retrieve all active payment methods from account that the hosted iframe on the PrestaShop checkout page accepts. Mind that this button is for information purposes only, as our platform will always accept all active credit card payment methods in your account. |
| Template filename |
Enter the file name of your template to adapt the iframe to the look and feel of your shop. To learn how to create templates, see our dedicated chapters in the Hosted Tokenization Page guides. |
- Click on "Save" to confirm your settings.
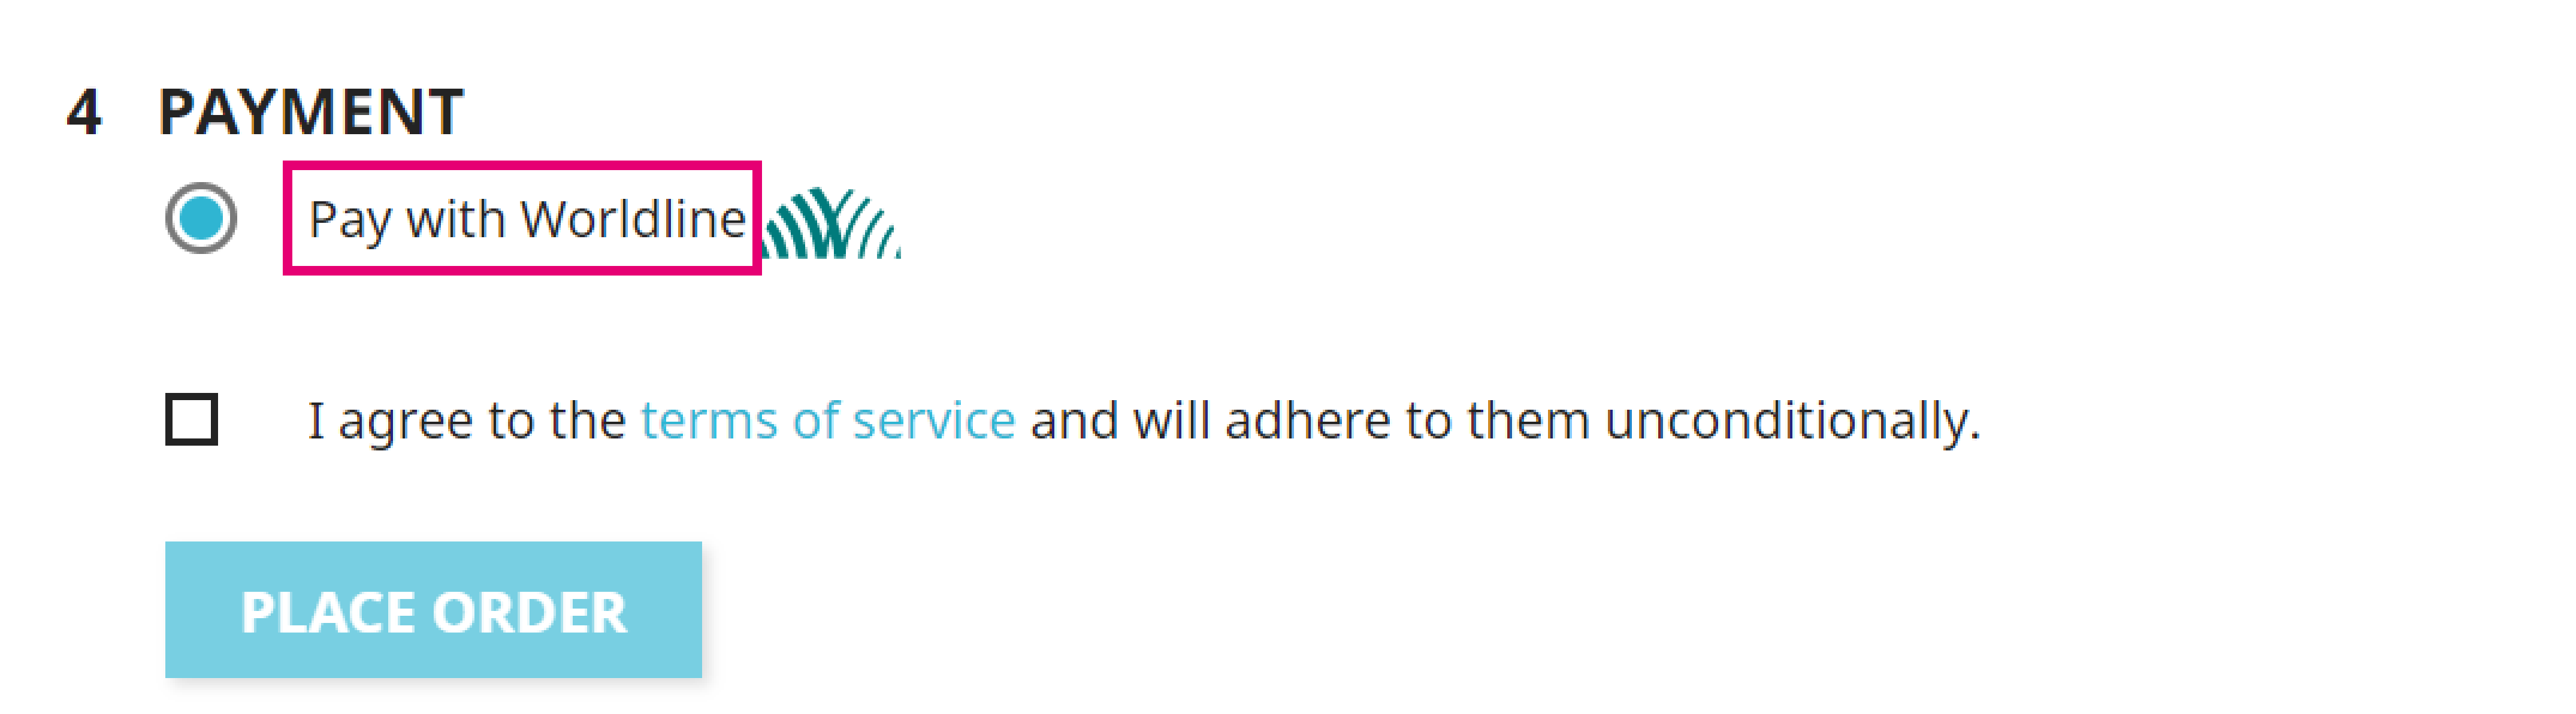
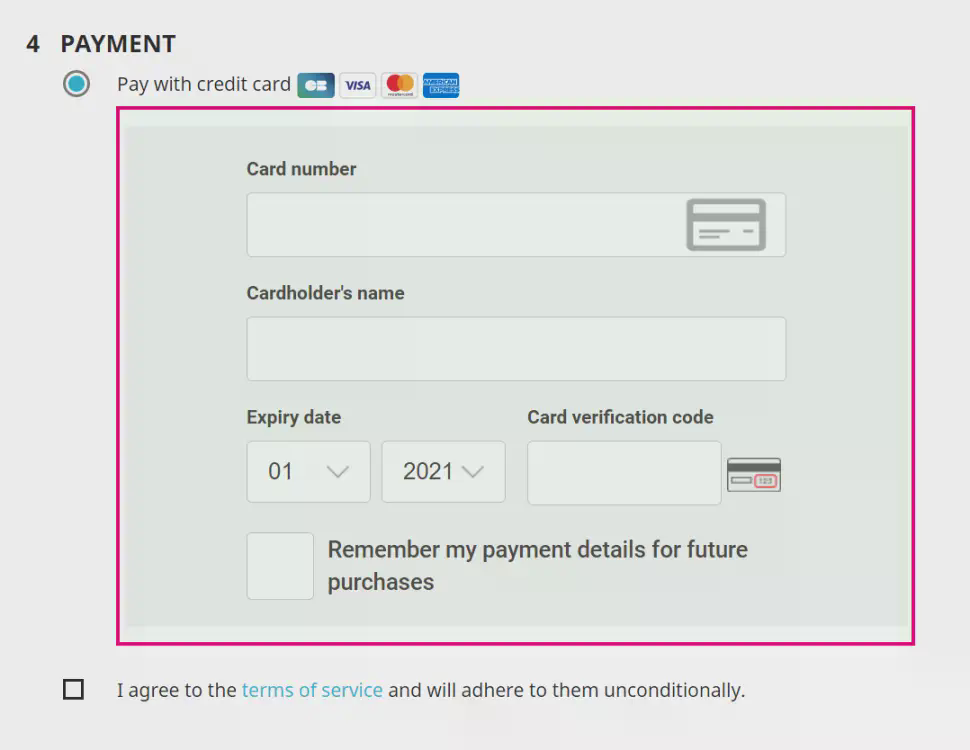
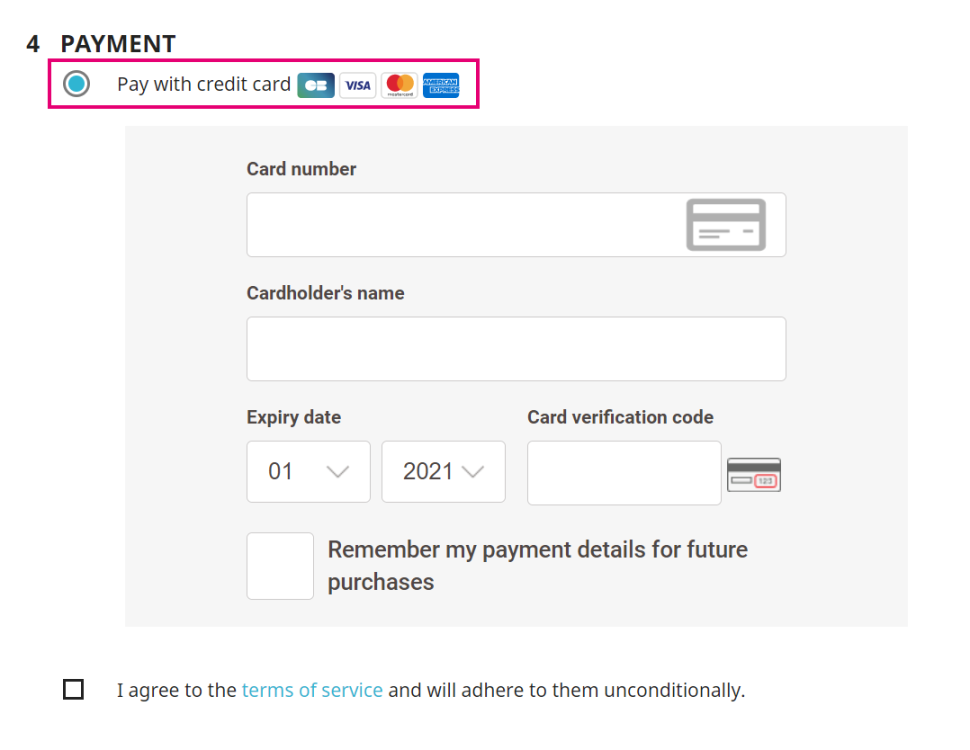
The image above shows the customizable radio button text on the PrestaShop checkout page.
The image above shows uploaded logo how it appears on the PrestaShop checkout page.
- Do not select "NO" at the same time for:
"Payment method selection after redirect"
"Payment method selection before redirect"
"Accept cards payments on iframe"
To prevent that no payment methods at all are available on your checkout page make sure to activate all required payment methods in your account.
Troubleshoot errors
If you encounter issues during the installation/configuration process or when using the plugin, have a look at the following list of possible solutions:
- Use the PrestaShop standard log feature (CONFIGURE > Advanced Parameters > Logs) to solve problems related to user access rights and time outs.
- Activate debug mode via CONFIGURE > Advanced Parameters > Performance > Debug mode to get more information on possible errors.
- Get additional logs via IMPROVE > Modules > Module Manager > Payment > ADVANCED SETTINGS > Payment Settings > Enable advanced logging.
- Check that the module is correctly hooked to solve missing/malfunctional blocks in the PrestaShop Back Office or Front Office. Go to IMPROVE > Design > Positions. Select "Worldline Online Payments" in "Show" dropdown menu to confirm that:
- "Display non-positionable hooks” is flagged".
- The list of the following hooks is present.
actionAdminControllerSetMedia
actionFrontControllerSetMedia
actionOrderStatusPostUpdate
customerAccount
displayAdminOrderLeft
displayAdminOrderMainBottom
displayBackOfficeFooter
displayHeader
displayPaymentByBinaries
displayPaymentTop
displayPDFInvoice
orderConfirmation
paymentOptions
If a hook is missing, go to IMPROVE > Design > Positions. Select "Wordline Online Payments" from dropdown menu "Module" and add the missing hook in field "Transplant to".
Manage payments
We have designed the plugin to follow-up on your orders automatically and autonomously, freeing you from the administration involved. Learn here how to use our plugin effectively which could help your business to thrive!
Perform maintenance operations
Captures, refunds and cancellations of authorisations are standard processes (maintenance operations) in your everyday business logic. Learn here how to perform these operations directly in the PrestaShop Back Office:
- Login to the PrestShop Back Office. Go to Sell > Order Settings > Order Settings. Click on the order in the table.
- In the order overview, go to "Worldline Online Payments". Depending on the transaction’s current status, you can capture/cancel/refund by clicking on the respective button.
- Make sure to always use the Worldline Online Payments block for maintenance transactions.
- The "Partial Refund" button on top of the order page is only for administrative purposes, it will NOT create a refund transaction.
Perform test transactions
Use our platform's test environment to make sure your plugin works as intended. We offer test data sets on our dedicated Test cases page. Target our test environment as described in the "Configure Plugin" section.
Make sure to switch to the LIVE environment as soon as you have finalised your tests.